2018 Volkswagen Lavida cabin air filter replacement
A calm, step-by-step guide to checking fitment, replacing the filter behind the glove box, and knowing when an odor needs professional cleaning.
When does this guide apply?
Put every tool and part within reach.
Do one clear step at a time.
On mobile, each step keeps one visual focus. If the real vehicle differs from the photo, stop instead of forcing the part.
Park and make the vehicle safe
Park on level ground, switch the vehicle off, and apply the parking brake.

Do not work while the vehicle is moving or while nearby parts are hot.
Open the glove box
Empty the glove box and identify the side stops and damper before releasing anything.
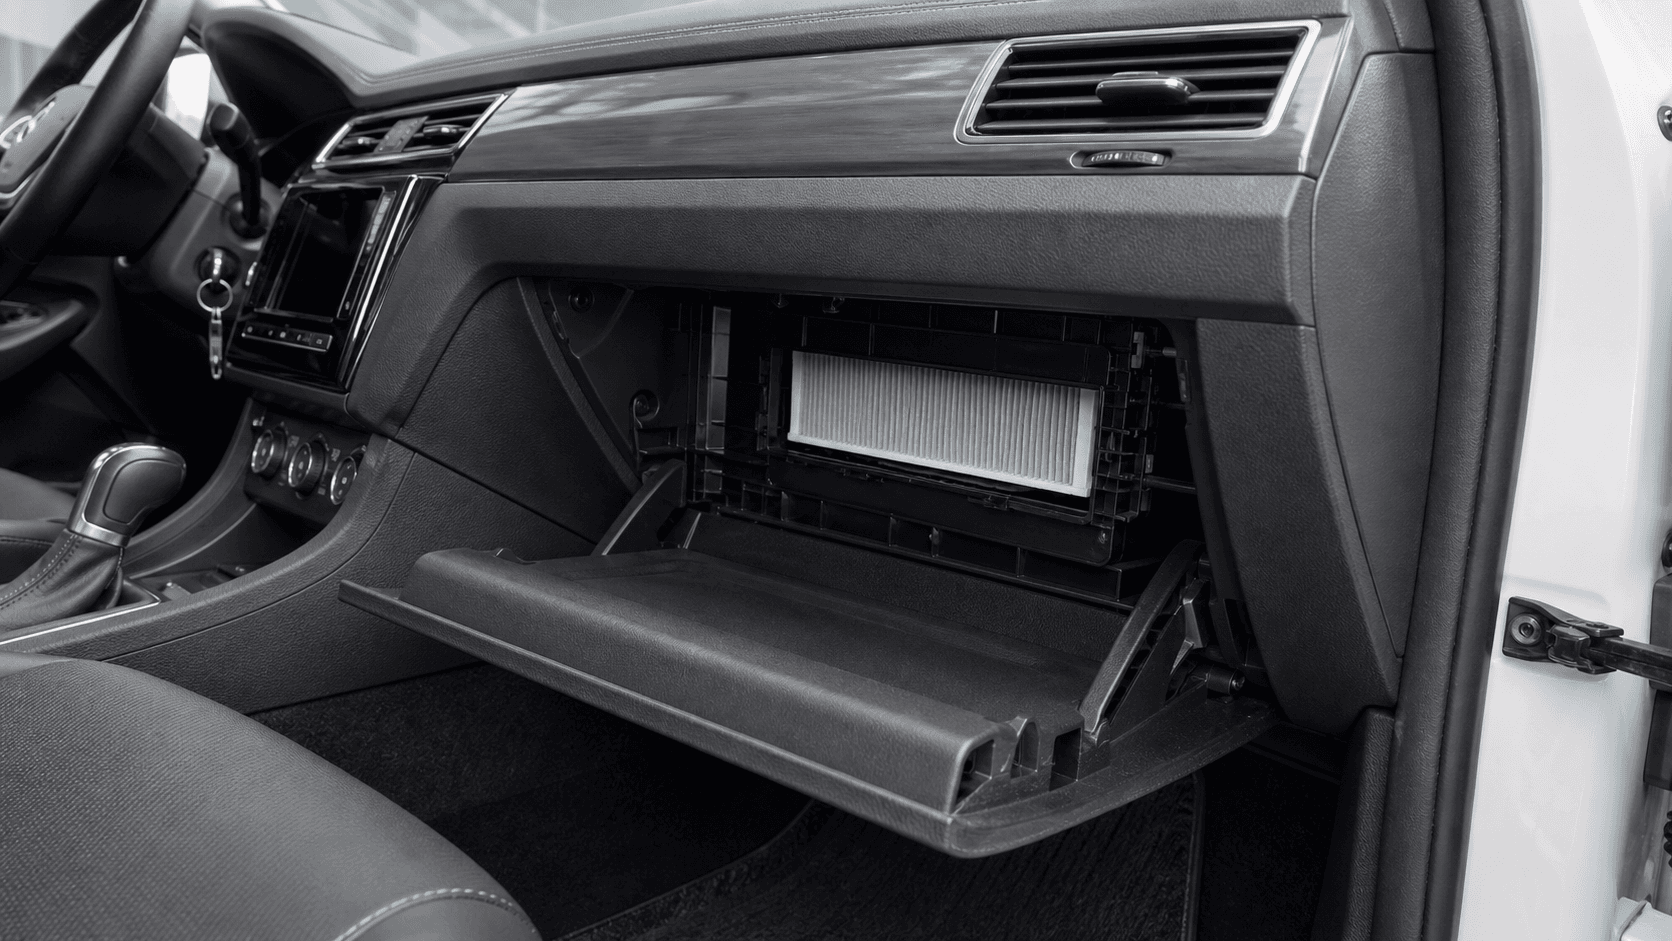
Trim details vary by model year. Stop if the layout does not match the guide.
Remove the filter cover
Press the cover tabs gently and pull the cover straight out without twisting it.
Take a photo of the original airflow arrow before removing the old filter.
Install the replacement
Compare dimensions, align the airflow arrow, and slide the new filter into the housing.
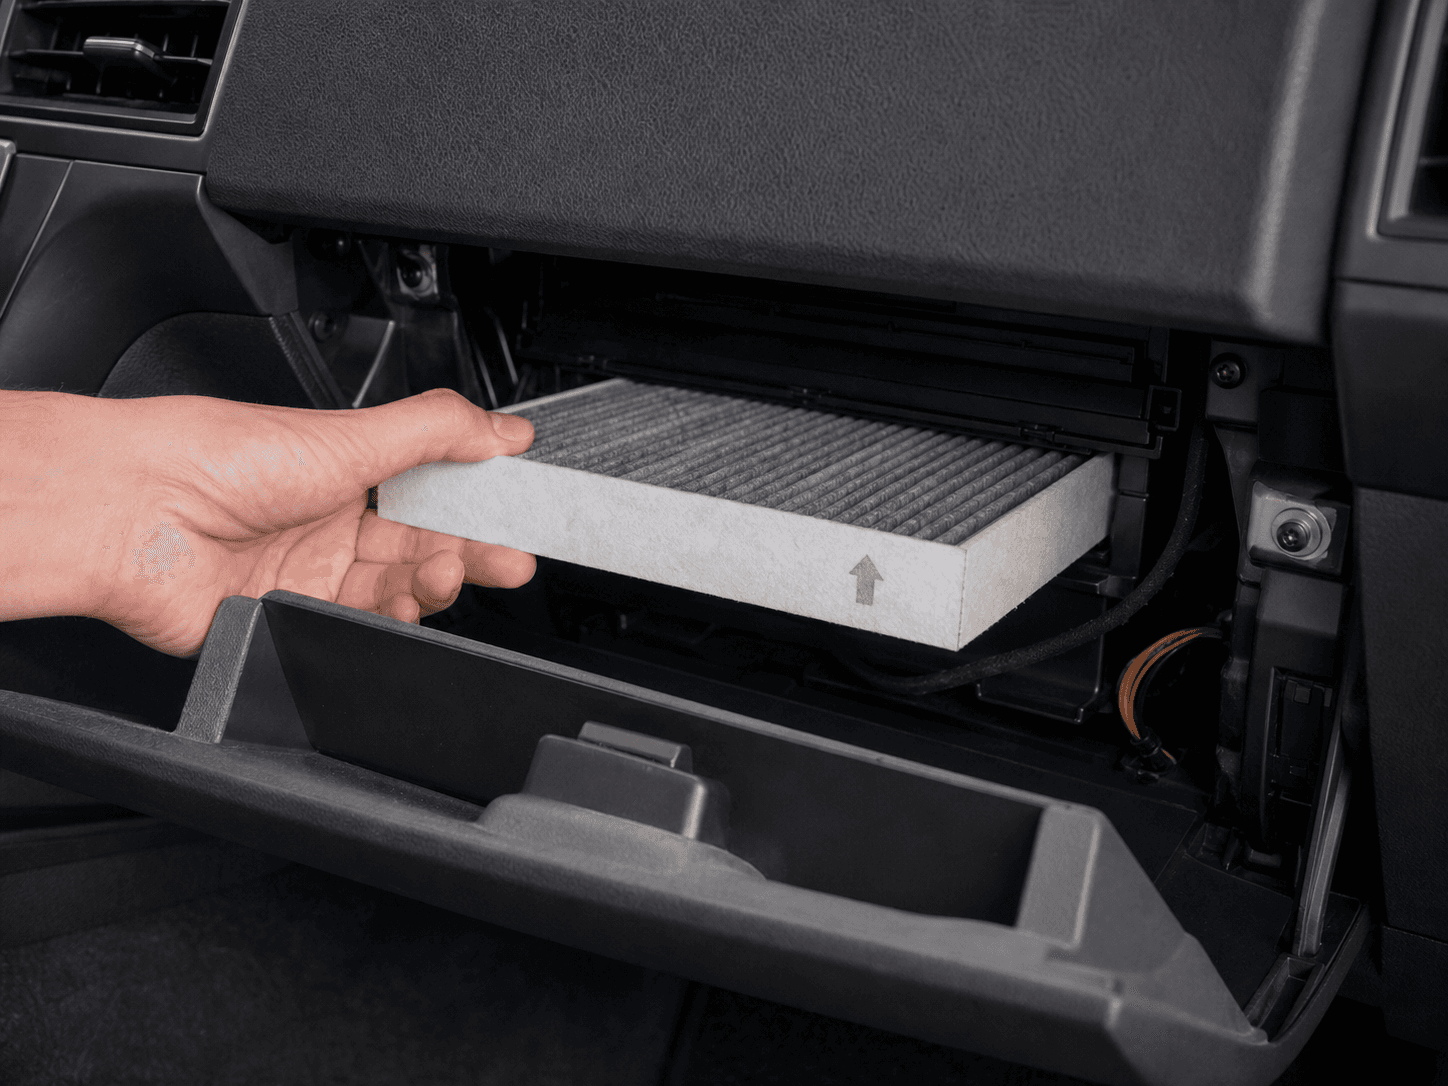
If the filter buckles or needs force, its size or orientation is probably wrong.
Reassemble and test
Refit the cover and glove box, then run the fan at several speeds and listen for unusual noise.
Stop and seek professional help if the odor remains or a new warning appears.
Use motion only when the photo is not enough.
Key moment 02:15Cabin air filter access and airflow direction
Confirm that the vehicle and model year in the video match your own before copying any action.
Open videoAvoid the usual rework.
- 1Buying by model name without checking the model year
- 2Installing the airflow arrow in the wrong direction
- 3Forcing a cover tab that has not released
- 4Skipping the final fan test
Three choices, one fitment check.
These are demonstration options. Confirm dimensions, model year, and seller fitment before purchasing.
Standard particulate cabin filter
$8$12
Branded activated-carbon filter
$16$22
High-efficiency odor-control filter
$24$32
If the odor remains after replacement, the evaporator or drain may need professional cleaning. Stop if the guide does not match your vehicle or if wiring has been modified.
Continue with verified English content.
Check once more before starting.
Follow the owner's manual and inspect it sooner in dusty or humid conditions. Condition matters more than a fixed calendar date.
Discussion can add context.
72 owner ratings
Join the discussion
English comments and corrections enter moderation before publication.
The airflow arrow photo was the detail that made reassembly straightforward.